Sew Cute Buddies
Before you start, you need to know:
Felting needles are sharper than the sharpest sharp thing you can think of. While felting, always watch your hands and fingers to avoid boo-boos. Make sure your pokes are gentle, too.
Ready? Ok!
Materials and Tools:
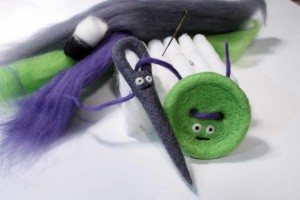
Foam, 1 felting needle, wool fiber (colors: Silver Fox Grey, Apple, Winkle, Black, and White) and 2 magnets. You’ll also need some strong fabric to metal glue. Optional: a piece of yarn or ribbon
Let’s start with the Needle!
1. Pull the fiber

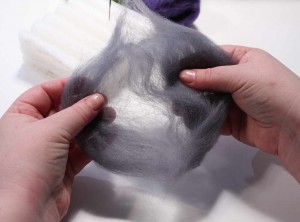
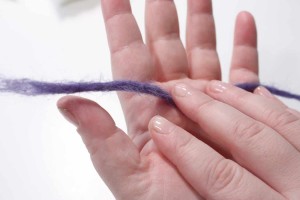
Start with a tuft of your base color about 4” long. (The fiber pulls apart more easily if you place your hands about 4-5 inches apart and pull gently.)
2. Loosen the fiber
3. Fold and the roll fiber
4. Start your poking
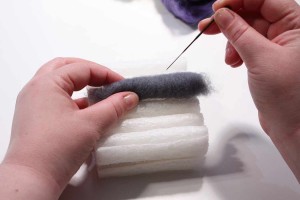
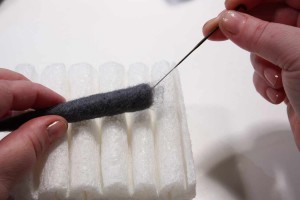
Place the log on the foam and gently poke the needle into the fiber. Continue using gentle pokes all over to form the body of the needle, rolling it along and moving it around the foam. (Moving it helps keep the log from permanently sticking to the foam.)
♥ ….
Bonus Tip for The People: Gentle pokes work best. The business end of the needle is only an inch at the tip. Poke any further than that and it’s a waste of your efforts.
…. ♥
5. Add fiber
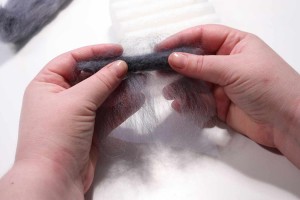
Continue gently poking the needle from all sides. If it’s about the right size but not as thick or as strong as you’d like, pull a little more roving, loosely wrap it around the carrot and keep poking. Repeat as needed.
6. Head up
7. Just the tip
♥ ….
Ooh, Look! A Tip!: Even when you are poking at an angle, make sure your needle goes in and out in the same direction. Otherwise, it could snap.
…. ♥
Hey! Put the pointy needle log you just made aside while we make the piece that will become the top of the needle!
8. Pull more fiber
9. Stretch it out

Gently pull the fiber at each end, stretching and thinning it but keeping it in one piece. (If you accidentally pull it into two pieces, just overlay one end on the other and pretend it never happened!)
10. Poke it, why don’t you?
11. Keep on pokin’ on!

Keep poking all over to shape the piece. Add fiber as necessary, leaving the two ends a little fuzzy. This piece should be about 3″ long and 1/4″ wide.
Now grab your needle log, and let’s do this thing!
12. Hold on to your head
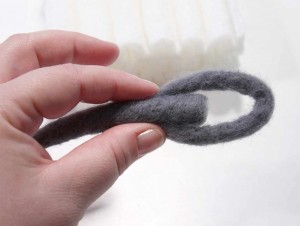
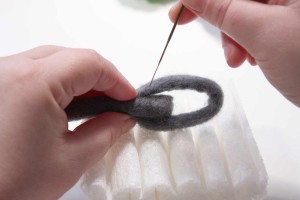
Look at this picture. See how it’s like we bent the long skinny piece around the fat end of the needle log until it looks a little like it’s eating it? Do that, ok?
13. It’s the eye of the needle, it’s the thrill of the fight!
14. Keep your head about you
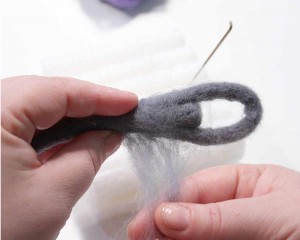
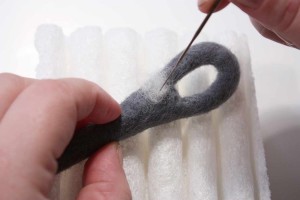
Wrap a thin wisp of fiber around the connections you just made, then poke it all over, refining the shape of the needle head.
15. Keep your head about you
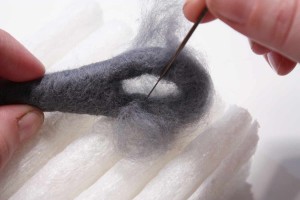
Take another small tuft and wrap it around the head of the needle from the inside. Move the needle about as needed to poke the inside of the needle’s eye to build thickness and refine the shape.
16. Top of the needle to ya!
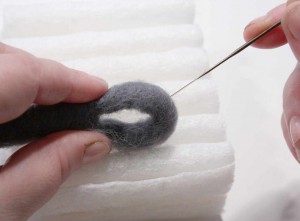
You know that fiber you just added and poked inside the needle’s eye? You gotta poke and shape it on the outside of the needle’s eye too.
17. Poke it all over again!
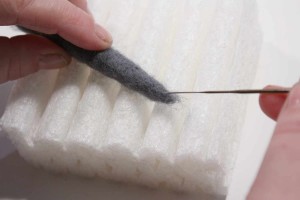
Add and poke fiber as needed to smooth out the entire needle shape, top to bottom. Tiny pokes at the tip will help further “sharpen” your needle!
18. Eye, eye!
19. Shape the eye
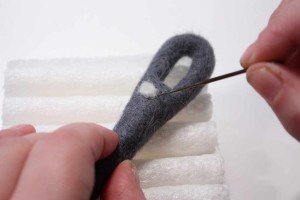
Gently poke the edges of the eye towards the center. This will make it even more secure while creating a puffy shape.
20. Eye see you!
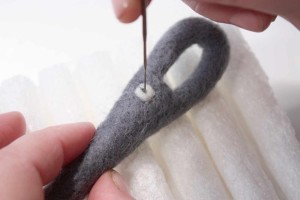
Take a teeny-weeny bit of black fiber and poke it into the center of the eyeball. Repeat steps 18 -20 to make the second eye.
21. Speak it, needle!
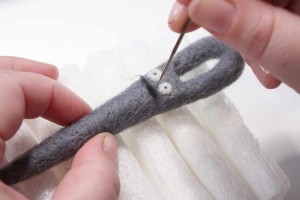
For the mouth, roll a very thin wisp into a log approx. the thickness of a toothpick.Gently poke the thin log into place. When your needle has a face, make sure you tell it “hi” for me, ok?
You did it!! Take a potty break, get yourself a snack, and get ready to felt yourself a button, pal!
Button, button, let’s make a button!
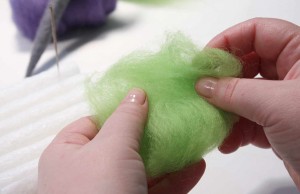
1. Pull the fiber
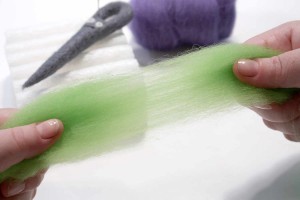
Start with a tuft of your base color about 4” long. (The fiber pulls apart more easily if you place your hands about 4-5 inches apart and pull gently.)
|
2. Loosen the fiber
|
3. Start your poking
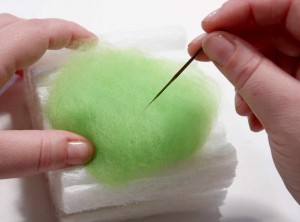
Place the disc on the foam and gently poke the needle into the fiber. Pick up the disc, flip it over, and poke some more. (Flipping often keeps it from permanently sticking to the foam.)
♥ ….
Bonus Tip for The People: Gentle pokes work best. The business end of the needle is only an inch at the tip. Poke any further than that and it’s a waste of your efforts.
…. ♥
|
4. Wrap & poke
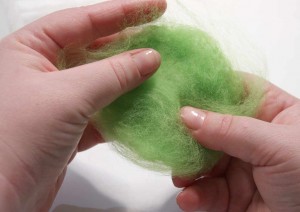
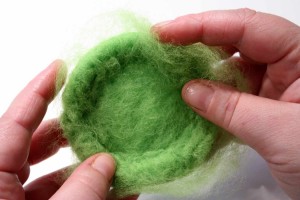
Take a thin tuft of fiber and wrap it loosely around your disc. Continue to poke the disc from all angles, flipping it often.
5. Poke the edge

Once the disc starts to thicken, place it on its edge and use very tiny, gentle pokes to thicken and shape it even more.
♥ ….
Oh yeah, it’s a Tip!: Even when you are poking at an angle, make sure your needle goes in and out in the same direction. Otherwise, it could snap.
…. ♥
||
6. On the button ledge
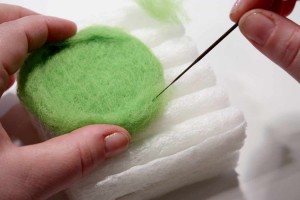
Add short lengths of fiber around the edges of the disc to build up the lip of the button edge. First, gently felt from the top. As the sides begin to gain mass, poke all over to refine the shape. Add more short lengths as needed to build the button lip.
7. Add fiber, keep on poking!
8. Get the inside edge
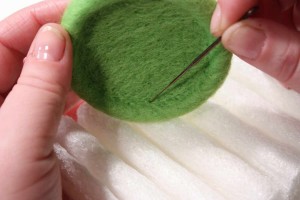
Holding the button on its side, use tiny pokes on the inside edge of the button lip to refine the shape. Turn and poke as needed.
9. Where’s the holes?

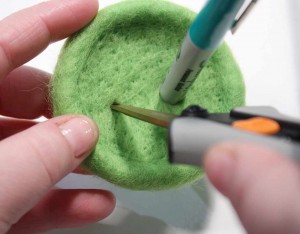
Use your felting needle to mark the center of your button, and poke it through to the foam to hold it in place. On each side of the center, use a fabric marker or pencil to mark where the button holes will be. (Feel free to use a ruler or just wing it!)
10. Snip snip
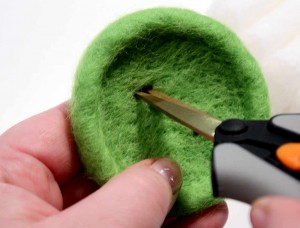
Use some scissors (sharp, thin-tipped scissors work best) to snip a small slit on one of your marks.
11. Again!
12. Poke against the place markers!
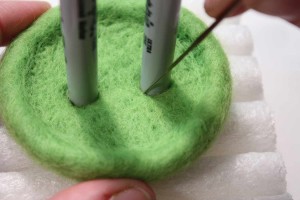
Hold the button onto the foam and gently poke around the edges of the pens to keep them from shrinking too much when the pens are removed.
13. Go down the button hole!

Use teeny pokes on the inside edge of each hole, back and front, to smooth the shape and make sure the holes stay where you put ’em.
14. Button it up!
Poke the button all over to finish refining the shape and texture. Then, to make two eyes and a mouth, follow steps 18 – 21 of the needle tutorial.
You’ve got the button!! Ready to make some faux-yarn? Sure, we ALL are!
If you really wanted to, you can easily substitute a real piece of yarn or thread and skip this process of felting a little piece of yarn. But it’s not hard to make one yourself… let’s do it!
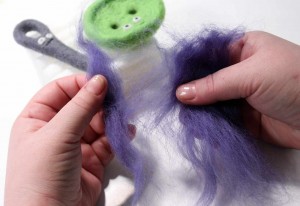
1. Pull the fiber
2. Roll it
3. Pokes all around
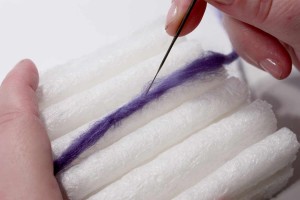
Poke the fiber up and down the length. Pick it off the foam, roll it over and keep poking. Repeat a couple times as needed.
4. Pull the fiber
Almost done! Let’s put it all together now!
1. Thread it
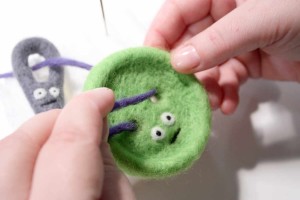
Feed the yarn through the eye of the needle, up through the back of one button hole and back down through the other.
2. Secure it
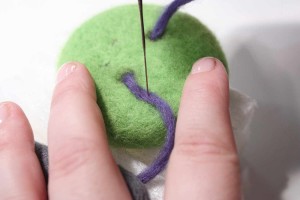
Use tiny, shallow pokes to secure the yarn to the back of your button and needle as needed to keep everything in place.
To make these into magnets: Add a drop of glue to the magnets and place one on the back of the needle, and the other on the back of the button. Make sure to follow the instructions on your glue because, like snowflakes, all glues are different.
To make these into ornaments: Glue a loop of ribbon to the back of the needle and button, or felt a loop of yarn instead!
You did it! You totally felted, so… that means you’re a felter now! Sweet.
